We got a couple years ago as a gift from some friends a kitchenaid wireless hand blender.
It’s a great hand blender, with many accessories, and being wireless, being able to carry it around the kitchen without worrying about cables is a great advantage.
The troubles started one or two years later. The battery started to loose capacity, having always less autonomy. We then stopped using the blender as battery life was too short to use it.
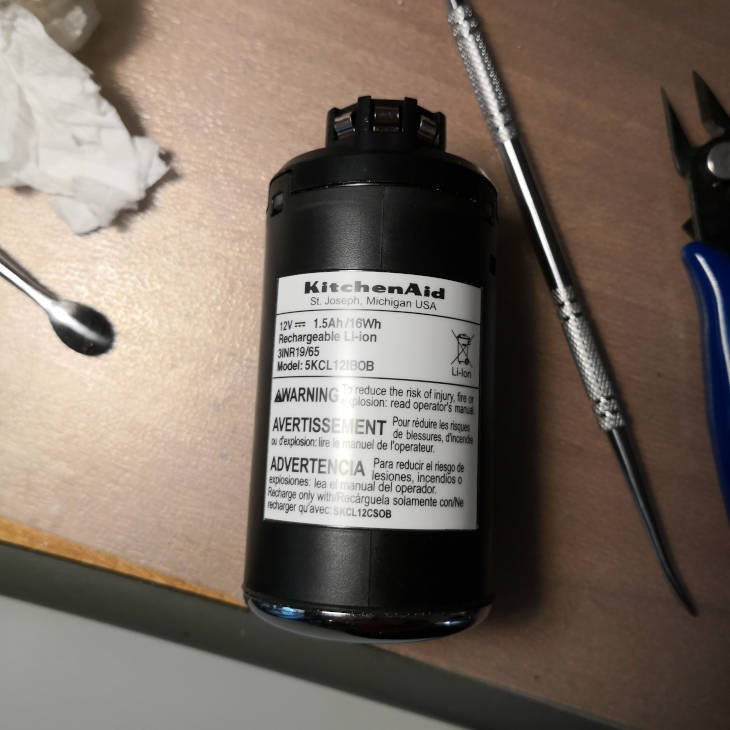
Searching for a replacement battery on amazon for the 5KCL12IBER battery, led me to a 45 Euro replacement original battery. So I put it on my wish list waiting for a sale to drop the price or for an alternative.
Being a DIY addicted, and being able to solder, I decided one day to try the DIY cells replacement road. Searching online for details or a tutorial led me to nothing, I wanted at least to se a battery disassembly to know which and how many cells it contained. In the last years the 18650 lithium cells are taking over the market, being installed almost everywhere, but I had no confirmation that kitchenaid didn’t use a strange proprietary cell.
So I decided to risk, open the battery and find out if the cells were easily replaceable. The following is the step by step guide on how to replace the cells on the Kitchenaid 5KCL12IBER battery.
As a disclaimer before starting I have to say that this is a DIY procedure, it will void the warranty, it can be dangerous (lithium cells are risky), and involves the risk of breaking the battery. So I will tell my story but I don’t assume any responsibility if you decide to follow this procedure, you proceed at your own risk.
Time needed: 1 hour.
How to replace kitchenaid hand blender battery cells
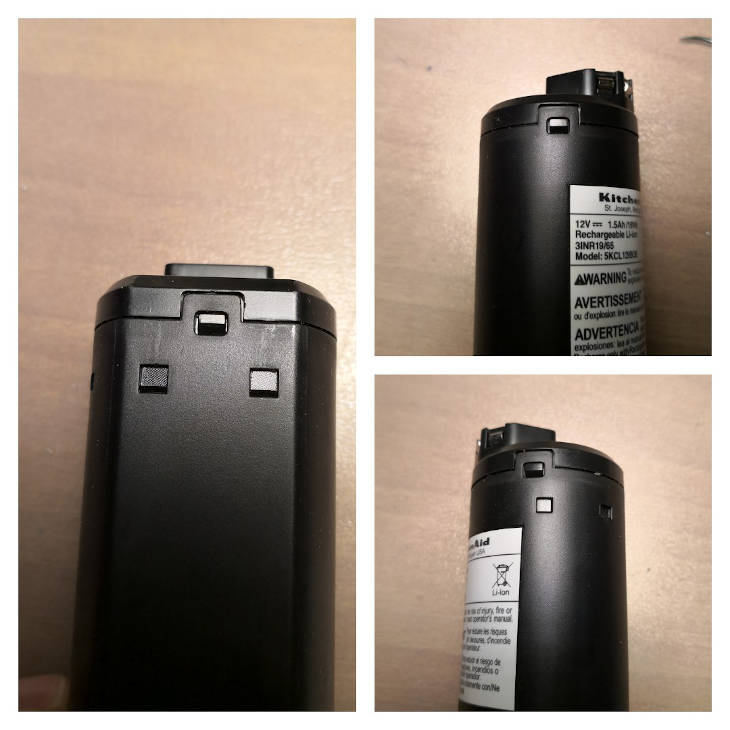
- Opening the battery
The first step is opening the battery. There are three clips retaining the cap, you have to gently pull them with something to unlock it.
- Take the cells pack out of the battery shell
When the three clips are unlocked you have to gently take the cells pack out of the plastic shell. This will expose the battery’s electric contacts and circuit board. Here comes the danger of shorting the battery os the individual cells, so from now on particular caution should be made to avoid contact with metallic objects that could short-circuit the battery.
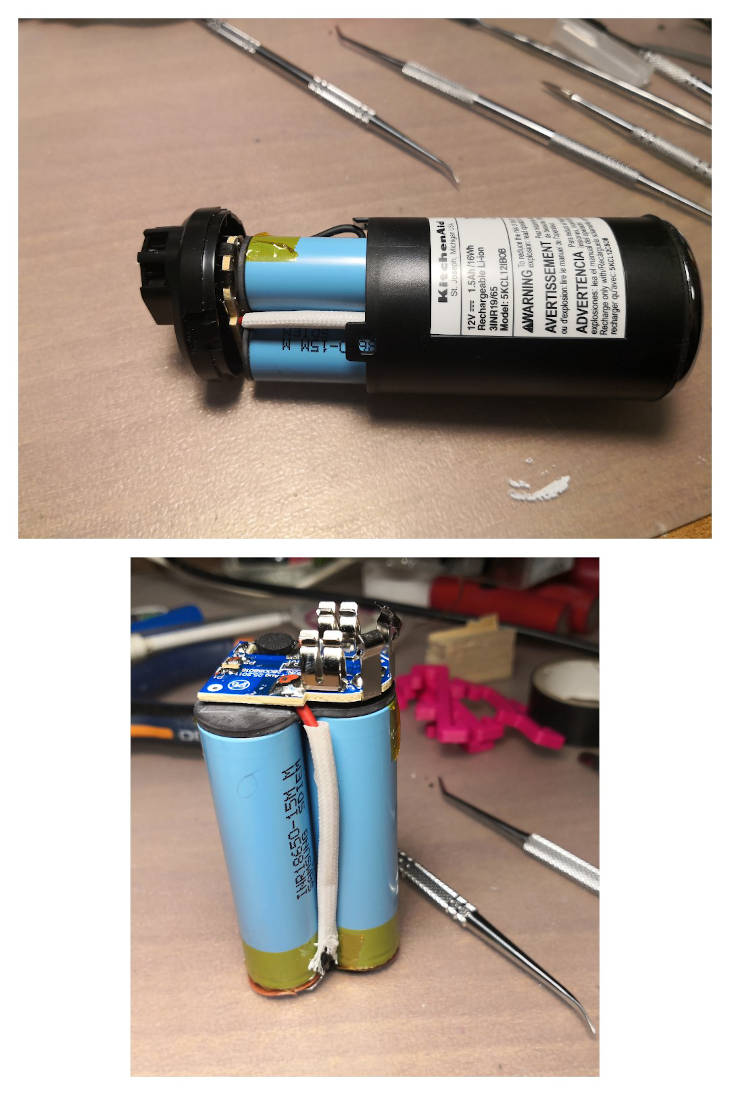
- Take photos, lots of them!
Take a moment to take some pictures of the assembled battery, they will be handy when rebuilding it. Take pictures to check the cells orientation, where each cable is soldered, and the orientation of the circuit board.
Always take a lot of pictures, with your smartphone will be a matter of minutes, but you never have enough of them.
Also, don’t fully trust my pictures, as your battery pack could be a slightly different model, with the cells arranged in a different order/orientation, so take your pictures of every step from now on and refer to them later.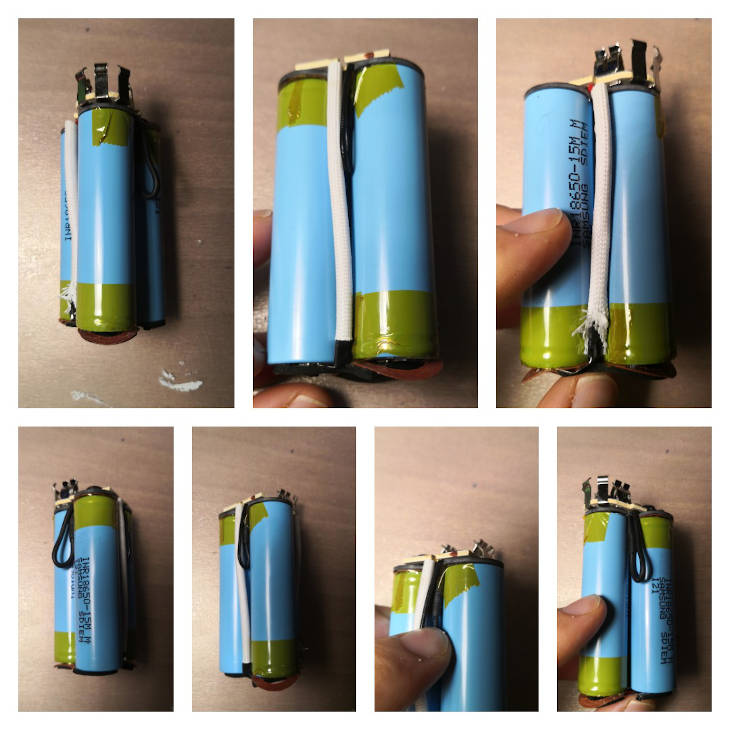
- Disassemble the cells
After taking the pictures that will guide us to rebuild the pack, we have to remove the cells.
I started from the bottom side (the one opposite to the circuit board), removing the protective pad. This will expose the soldered pads. The pads are spot welded, so the soldering iron will not help here. I used pliers to remove the pads from the cells, it takes some time but I decided to reuse the pads, so I made particular caution to not break them too much.
This is another point where you should take some pictures.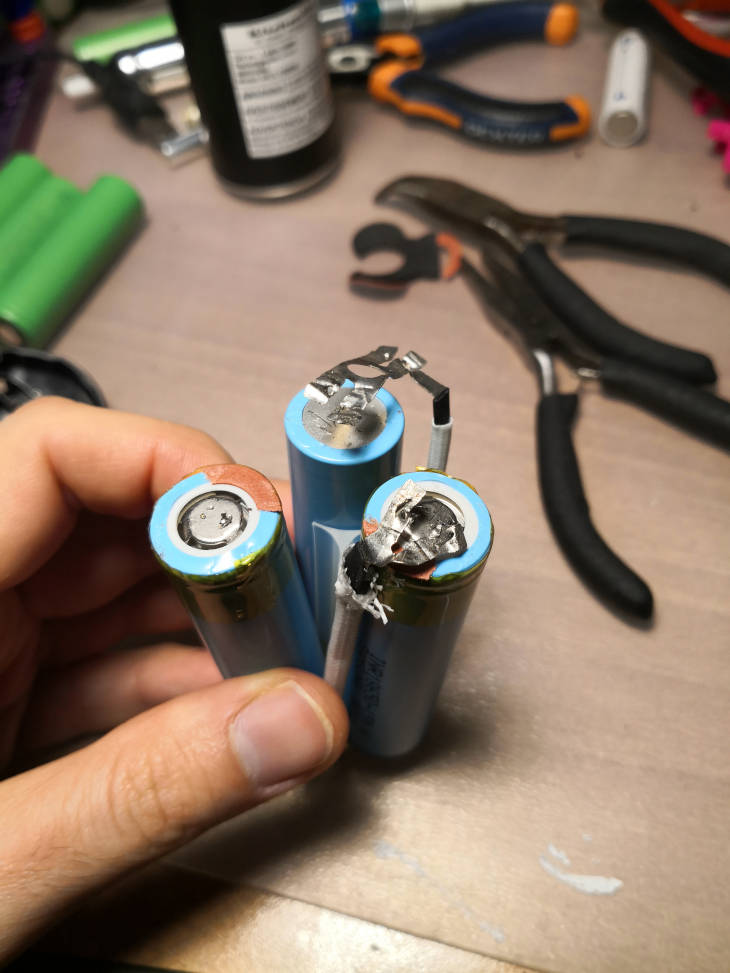
- Remove the top pads
When you finished with the bottom, a good practice could be to isolate the pads you removed with some electrical tape. I skipped this step and took particular caution to avoid them touching each other and the cells, but it’s a quick step and should not be skipped.
Then we can proceed to remove the top part, removing the circuit board, the insulating layer and the contact pads as we did with the other side.
Remember, always take pictures, I will never stop saying it, there’s nothing worse than not being to reassemble something because you don’t remember how it was assembled and you didn’t take enough pictures.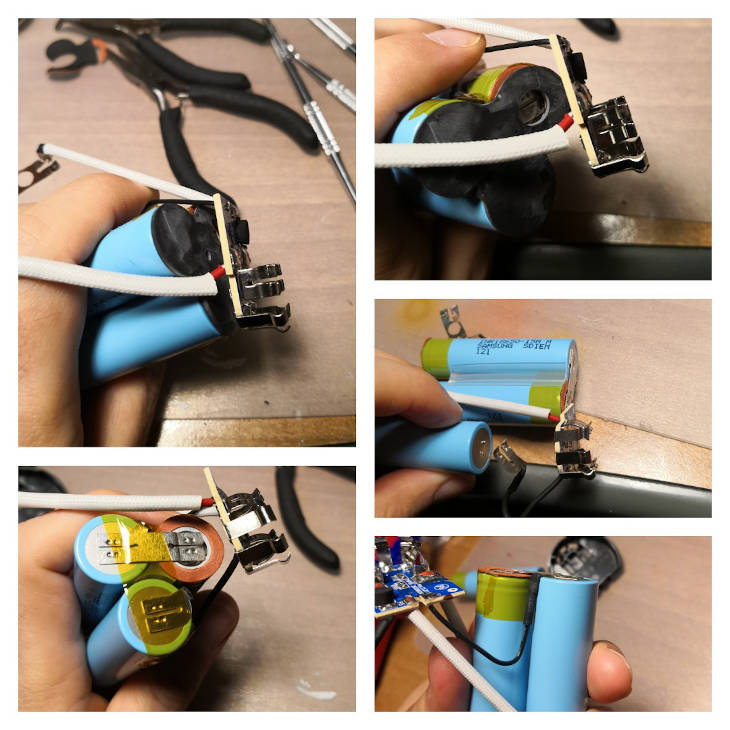
- The new cells
saThis battery pack, as you might have discovered, is composed of 3 18650 cells.
I replaced them with Sony Murata us18650vtc6 3000 mAh 35A flat top new cells.
I selected these because they have more capacity and can provide more current than the original ones. In this way I will have more battery life than the original kitchenaid battery and I am sure that 35A is enough current for the blender. Also they are from Sony, so they respect the specifications, it’s a widely known model from a trusted company. Avoid cheap Chinese cells, they don’t provide what they say, and don’t last, and you surely don’t want to replace them again in the near future. So spend a little more now and get good cells.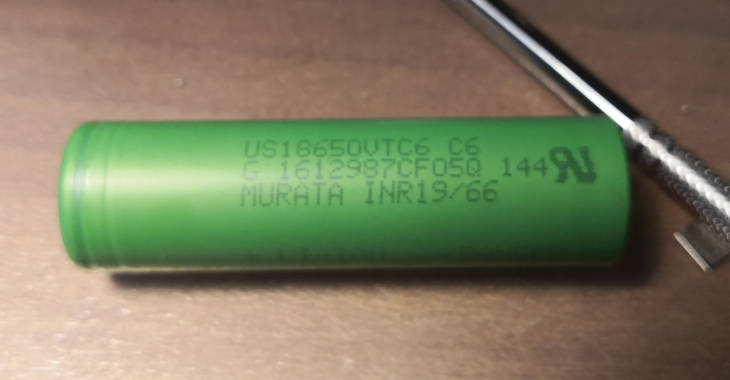
- Soldering 18650 cells
Soldering 18650 cells can be dangerous, as lithium cells are pretty delicate, and there is the risk of them exploding it you heat them too much or make something wrong. So, as I previously stated, you proceed at your own risk.
The best way to solder these cells would be to spot weld them, but not everyone has a spot welder, so many would use a soldering iron.
Using a soldering iron with 18650 cells is a delicate task, so take your time and don’t risk.
There are many videos, tutorials and blogs on how to solder 18650 cells with a soldering iron, here are some tips and precautions I try to follow when dealing with these.
Clean both the cell contact and the tab before starting.
Use a big iron tip, so the heat is transferred quickly.
Heat is your friend and your enemy at the same time, you have to melt the solder but without heating the battery too much.
Apply the iron only for a couple seconds. If you can’t complete the solder stop anyway, let the cell cool down and try again (never think “only a couple seconds more and it’s done”).
Pre tin the battery contacts, tin one side of each cell you have to solder, then the other side, so when you work on the second side of the first cell you gave it time to cool down.
Pre tin the tabs, so when you will solder them to the cell you have only to melt the solder on the tab and the battery contact, that’s quicker than having to apply solder too.
Be quick when applying heat with the iron, and slow when you have to wait for the cells to cool down.
Every time you take the iron off from a cell contact, let it fully cool down before applying heat again.
Use quality solder, I user Kester “44” rosin core I ordered from USA to Italy, it costed me a lot
of money compared to a locally available solder, but it’s a SN63PB37 solder, so it melts at a slightly lower temperature, helping to prevent overheating. I used to use cheap solder, and the difference when I switched to 63/37 solder has been night and day on every application.
I also use Weller liquid flux, it’s another simple but great improvement especially when soldering big cables. - Tin every cell and every tab
Before starting to put together the cells, tin their contacts.
Scrape a little the contact with some sandpaper.
Clean the contact well.
I apply a little drop of Weller liquid flux.
Quickly tin the contact.
Work on one contact of the first cell, then on one of the second and one of the third. When you finished check that the first cell is cool again and start with the second contact of it, then the second contact of the second cell and so on.
If the first cell is not cool for the second contact, then you can tin the connection tabs in the meantime. - Reassembling the cells together
The first step to start rebuilding the pack is to put the three cells in the right order with the proper orientation (you took pictures while disassembling right?), align them and fix them together with some electrical tape. This will help when soldering everything together, then the cells will be kept together mainly by the soldering tabs.
- Solder the top side
Check the cells orientation from you pictures and start soldering the top connection tabs.
Always be cautious to avoid short circuits with the tabs and the circuit board.
Remember that heat can damage the cells, and they can get damaged or even explode, so always be quick when applying heat and take the time to let everything cool down. Even if this means soldering a tab every 5-10 minutes, don’t risk and let it cool.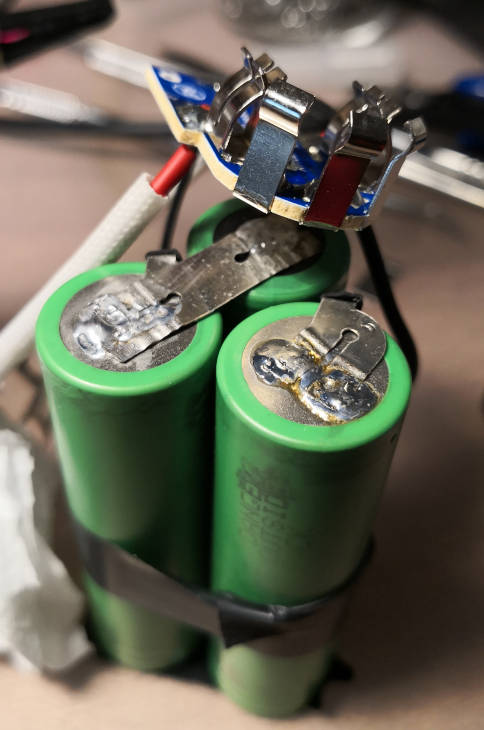
- Clean the joints
After soldering the tabs, I cleaned the joints from flux residues. Flux can be corrosive, so take some time to at least clean as much as you can.
I used a cloth with a drop of isopropyl alcohol.
Even in this step, always take care to avoid short circuits.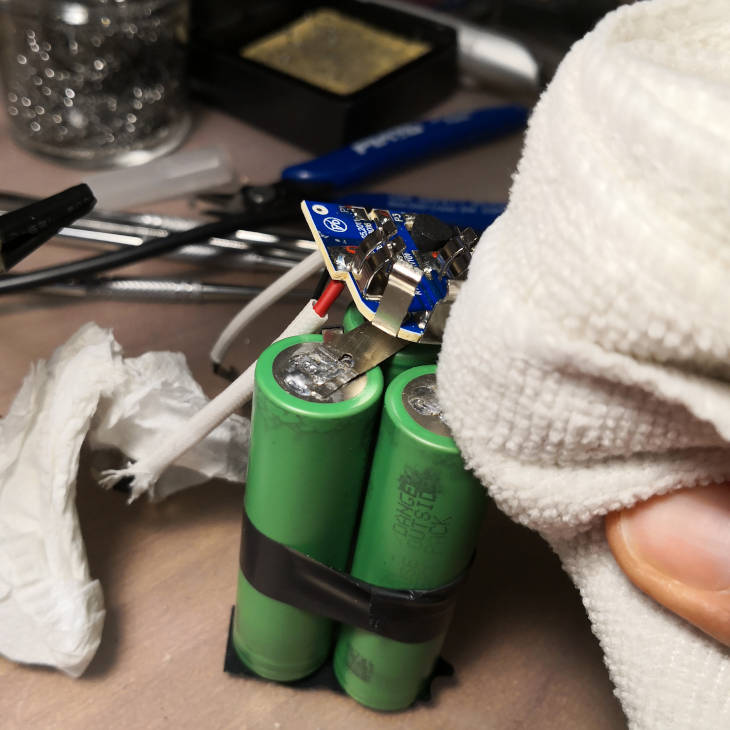
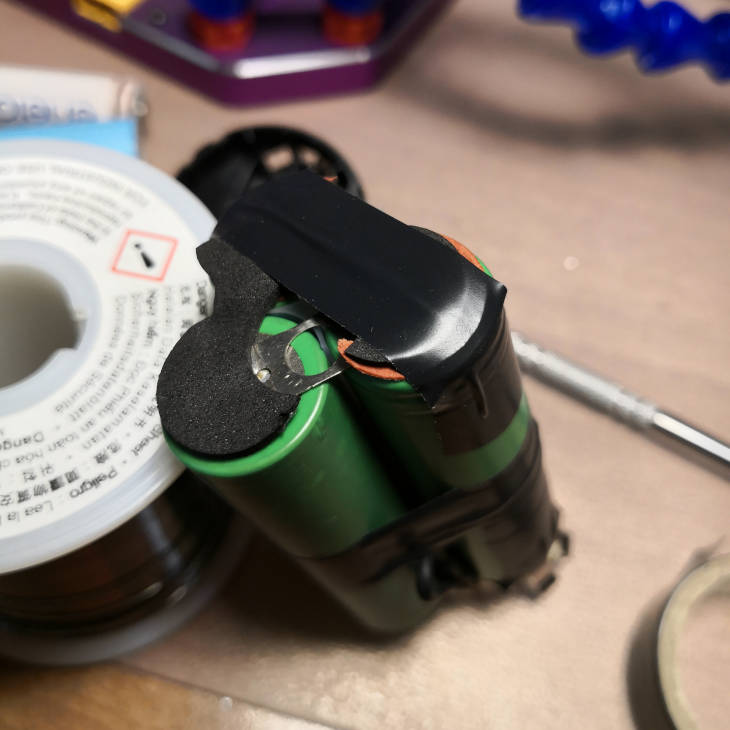
- Add the insulating pad and the tape to keep the cells together
After soldering the top cells, add the insulating pad. I also added a piece of electrical tape to keep the cells together and the pad in place.

- Solder the bottom side
Now we have to solder the bottom side contacts.
You can follow the same steps as the top side.
Solder and clean the residues.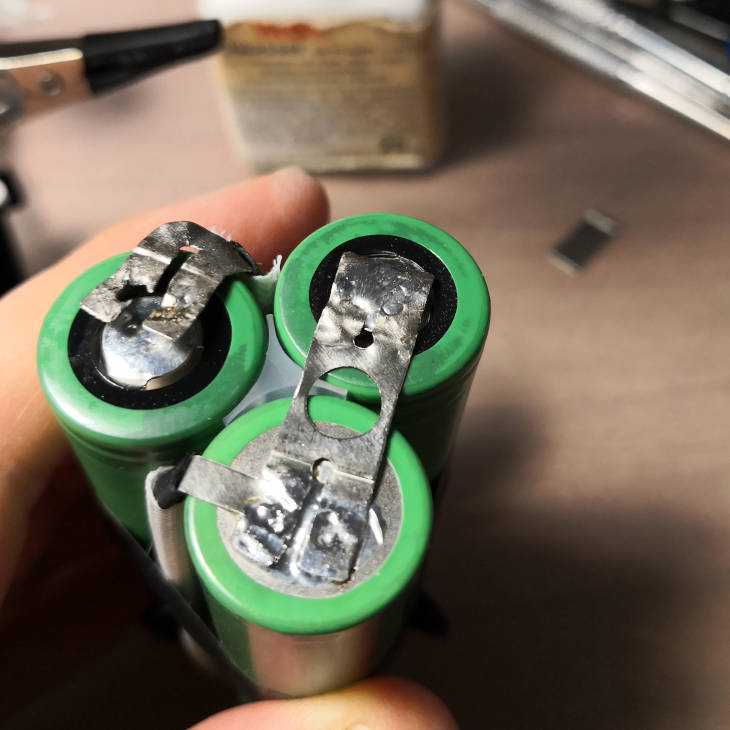
- Apply the bottom insulating pads
After soldering, apply the bottom insulating pad
- Final checks
Now that the cells are soldered together you can check that everything is working.
You can test the battery with a multimeter on the top connectors on the circuit board.
You should test that the four top tabs are connected to the cells, you should have the voltage of a single cell between each pair of adjacent connectors.
Between the two bigger tabs you should have the voltage of the three cells in series. - Putting the battery back inside the enclosure
After checking that everything is ok, you can put the battery back into the plastic container.
The fit si tight, I had to remove some of the electrical tape to be able to slide the battery into the enclosure.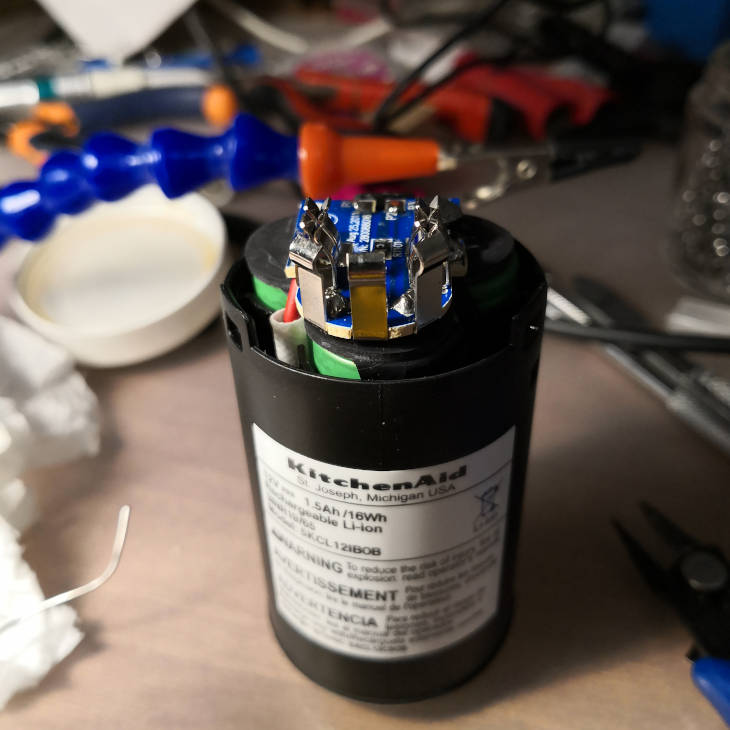
- Put the cover and you’re done!
Now you can put the top cover and close the plastic container.
Now you have you restored battery, with quality cells and with more capacity than the original one!
I used it for more than two months before writing the article, and everything is working fine! We use the blender daily for baby’s meals and we have to charge the battery every two or three weeks.
This has been a great DIY project, but as I said it involves some risks, so make it only if you feel confident with electronics and soldering.